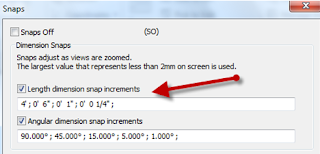
 Temporary dimensions are
created to the nearest perpendicular component and increment by the set value.
For example, if you set the snap to 6 cm, the dimension increments in values of
6 cm as you move the component to place it.
After you place a component,
Revit Architecture displays the temporary dimensions. When you place another
component, the temporary dimensions for the previous component no longer
display. To view the temporary dimensions of a component, click Modify and
select the component. Remember, the temporary dimensions are to the nearest
component, so the dimensions you see may be different from the original
temporary dimensions. If there are dimensions you want displayed at all times,
create permanent dimensions.
You can modify temporary
dimensions to reference the components you want by moving the witness lines.
You can also specify the
display and placement of temporary dimensions.
You can specify the display and placement of temporary dimensions
in the design.
You can set temporary dimensions to:
· measure from wall centerlines, wall faces, center of core, or core faces
· measure from door and window centerlines or door and window openings
To
specify temporary dimension settings:
1. Click Manage tab > Settings panel > Additional Settings drop-down > Temporary Dimensions.
2. From the Temporary Dimension Properties dialog, select the appropriate settings.
3. Click OK.
Logo designing is truly a significant way to advertise our company or product. Great job here on 1stwebdesigner. Thanks for the tangible and attainable help. temporary partitions
ReplyDelete