Here is the process of creating a "Pork Chop"
roof line... like so.


Like many Revit Roofs this one is made up of two separate roof
sections, the upper gable and the Lower Hip.

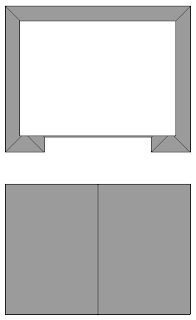
Firstly draw your bottom Hip Roof like so.
Note: I used the offset tool when sketching the inner box which is
basically the "cut-out" of the roof. These lines have no slope.


Then create the Upper Roof.
This is easy, it's just a gable roof of the same type and pitch.
I pull the ends in so the base Hip Roof overhangs more than the
Upper Gable Roof.
Now that the two parts of the roof are now created and lay evenly
on top of each other (this is important otherwise they wont join properly) you
can use the Join tool to make them look like one roof.
Then apply your gable walls, fascia board and gutters and your
done!

Here is the sequence.

You'll also notice that I created a Dutch Gable on the other end.
Hi - If possible, I would like to see you add a crown molding to the rake board. When I try to do it, I can't figure out how to get the shingles to extend out over the top of the trim.
ReplyDeleteThanks!
David
mancusoracing@yahoo.com
Unfortunately we can’t extend the components of the assembly like we can on wall assemblies.
DeleteI know what you mean though, it would be nice to extend the sheathing over the fascia board or trim etc… your SOL!
There are two things I have done in the past:
1: Not worried about it! And detailed it in the Section and Soffit/Fascia detail.
2: Run a sweep around the edge of your trim or roof with a profile of what you need and applied a material of shingles too it, you could then join the two together.
My preference is the first option… don’t worry about it!
Remember… don’t over model!
But in your case it may be an instance where the top of the trim extends out and it’s quite noticeable that the shingles don’t extend…
Hope this helps, let me know what you figure out.
This comment has been removed by a blog administrator.
ReplyDeleteI received this comment earlier today but had some issues with posting and had to remove it... so here I've posted it again...Sc
ReplyDeleteI was looking for a way to do a box (or boxed)cornice and found your great blog. Unfortunately, (and I hope this doesn't come off as condescending, I'm just trying to be as accurate as possible)what you are demonstrating is a "cornice return" (Francis D.K. Ching, 'A Visual Dictionary of Architecture', 2nd Ed, pg. 221) although I was going to try to find out how to do this next. I'm still wandering how you do a "box" cornice, sometimes referred to as a "closed cornice" or "bird box". Do you use a special profile and use the fascia tool? Robert on Box Cornice with Overhang Rake (aka Pork Chop Roof).
This situation is very much like the end of the gutter profile which do not have an end cap.!
DeleteWhat I typically do is create an in-place family and model the end closure. For gutter end caps I actually created an end cap family I can drop in, with an in-place family for the end closure you can easily edit the profile etc…
Hope this helps..
Sc.